Renewing or applying for a new passport can be an exciting milestone, signaling the start of a new trip and experience abroad. But an often overlooked part of the process is a passport photo, an important element that can quickly add to the overall cost. Fortunately, with a little preparation and attention to detail, you can easily take your passport photos from home, saving you both time and money and avoiding Walgreens’ expensive prices.
Benefits of Taking Your Passport Photo
Before diving into the steps, it’s important to understand why taking your own passport photo is a smart move. Not only can it save you a great deal of money compared to a photography service, but it also offers flexibility and assurance.
In 2023, our passports were up for renewal. Rather than find the closest Walgreens passport center and stand awkwardly in front of an employee, we opted to take the pictures from the comfort of our own home—we also saved nearly $40 by doing it ourselves.
Basically, we started by snapping a square photo with our phone. Then, we used the official government photo tool as a guide to square it out properly and then put it into our photo editing program.
Next, we selected a 4×4-inch photo format (in our photo editing program) and duplicated our image four times within the square frame. After that, we had it printed at Walgreens and got them for under $0.30 each!
We used our savings and applied it to one night at the Hampton Inn in Barcelona, on our dream trip to Spain!
Avoid Walgreens’ Awkwardness and Prices
Having control over the passport photo process offers confidence knowing that you have met all the important requirements and you are happy with your image. Remember, this passport will be active for 10 years so you want it to accurately represent you.
My first passport photo experience was at Walgreens was so awkward. It made me anxious knowing I had only one shot to capture a photo that I’d be happy with—taken by a very unenthusiastic and intimidating employee.
Also, don’t feel bad taking tons of images before you get the right one. Even Kylie Jenner admits to taking hundreds of captures before posting the perfect picture on her socials.
Step-By-Step Instructions To Take Your Passport Photo
Following these simple steps will help get the perfect passport photo.
1. Prepare the Background
The first step in taking your passport photo is to set up the right background. The U.S. State Department requires plain white or gray backgrounds, with no patterns or embroidery. A smooth surface or a large plain piece of paper or cloth can work well for a backdrop. Make sure the background is well-lit and there are no shadows or glare.
2. Consider Positioning and Camera Settings
Next, position yourself in front of the background, centering your head and shoulders while looking directly at the camera. Use a tripod or a solid surface to keep the camera stable and level. If you use a smartphone, consider investing in a tripod or small stand designed specifically for mobile devices. Later, you can use the tripod for your travels abroad.
3. Use Proper Light and Illumination
Proper lighting is essential for taking clear and well-lit passport photos. Natural daylight from a window or evenly distributed bright artificial light can work well. Avoid harsh shadows or bright areas in front of you. Moreover, adjust the exposure settings on your camera or smartphone to ensure that your upper body is entirely in focus and the image has uniform lighting.
4. Understand Passport Photo Guidelines
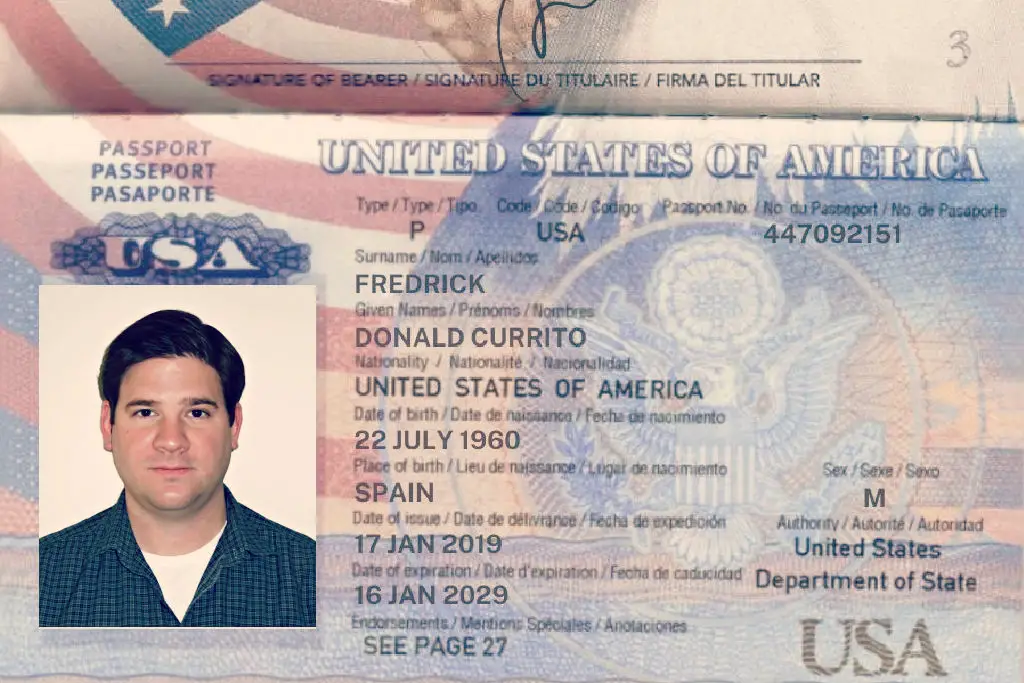
The U.S. The State Department requires passport photos to show a neutral face with eyes open and visible. Put your mouth straight in front of you. Do not roll your eyes, tilt your head, or wear your headwear unless it is for religious purposes. Be sure to adhere to cropping guidelines. To clarify, your head should take up between 50% and 69% of the entire image. Finally, be sure to set the picture ratio on your phone or camera to square.
Here are a few additional tips and guidelines:
- Do not wear any glasses or eyewear.
- Do not wear any camouflage or clothing that looks like a uniform.
- Jewelry and facial piercings can remain on as long as they do not obstruct your face.
- A soft smile is permitted as long as the mouth remains closed and the eyes open.
- If you add or remove a facial tattoo you should apply for a new passport.
- No selfies are allowed. Use a tripod or have someone take your photo.
5. Edit and Print Photos and Submit Paperwork
After selecting a suitable image, the next step is printing it. Start by taking the government-approved image and importing it into a photo editing program. Adjust its dimensions to create a 4×4 inch-sized picture. Then, duplicate the image four times within the file so that you have a total of four passport photos.
Travelers can have it printed at their nearest photo center or drugstore. However, if you’re doing it yourself, you can use the official government photo tool as a guide. Follow the specified size of 2 inches by 2 inches and use high-quality matte or glossy photo paper. Do not use image-altering software or editing tools.
By taking your own passport photos, you can save money and ensure that your image meets all expectations. Remember to follow the instructions closely and don’t hesitate to take another picture if necessary. With a little patience and attention to detail, you’ll save a few dollars to use on your next trip.
We Need Your Help
Did you find this article helpful? If so, bookmark it and when you’re planning your next vacation, click on any of the links below before finalizing reservations. You’ll get the best price, we’ll earn a small commission, and you’ll help support future articles.
Thank you!
BEST TRAVEL SEARCH ENGINES
🏘️ Book Accommodation
We use Tripadvisor to compare prices and reviews in advance and check availability
✈️ Book Your Flight
To find the cheapest flight options, use Skyscanner to find the most suitable choice for you
🚗 Reserve Rental Car
Use Discover Cars to compare prices and view the largest selection of vehicles